The global additive manufacturing industry reached $21.9 billion in 2025, showing a remarkable 9.1% growth.
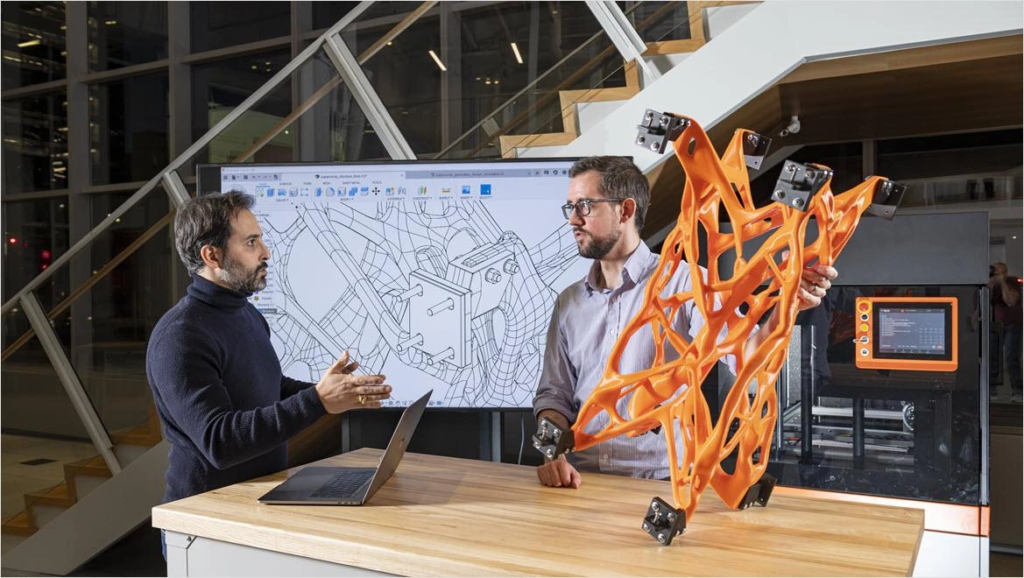
Designers who understand 3D printing can unlock amazing possibilities. They create intricate dragon heads with details finer than pencil points and produce functional parts with exact wall measurements. Your printed objects’ success, quality, and functionality depend heavily on digital 3D models optimized specifically for additive manufacturing.
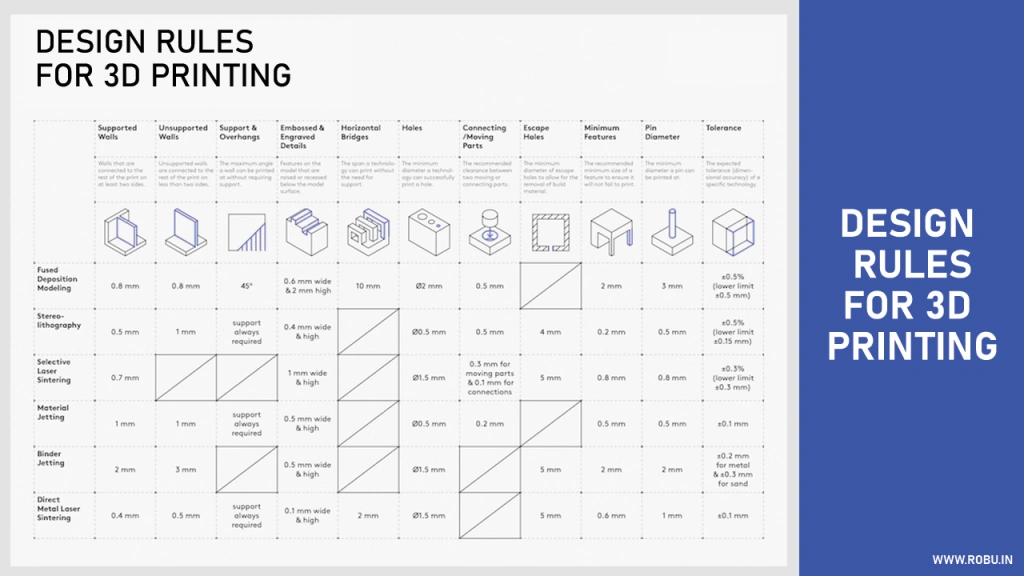
New designers need to grasp basic principles before diving into 3D print modeling. Different 3D printing technologies offer unique capabilities and come with their own limitations. To name just one example, successful prints require wall thicknesses above 0.8 mm across all 3D printers. Smart application of these specifications makes the real difference.
This piece guides beginners through the essential elements of 3D printing design. Readers will discover the right modeling tools and learn to solve common problems. The result? Visually striking 3D prints optimized perfectly for successful production.
Choose the Right Tools for 3D Modeling
The right design software sets you up for success in 3D printing. Each tool has unique strengths that help create models that print perfectly.
CAD vs sculpting software: what to use when
Your project needs to determine whether you should use CAD or sculpting software. CAD software shines at creating precise, geometric designs from technical drawings. You start with a 2D sketch and extrude it into a 3D form. This makes it great for functional parts that need exact measurements. Sculpting software works like digital clay. Artists can create organic shapes by pushing, pulling, and working with 3D forms directly.
CAD software (like Fusion 360 or FreeCAD) works best to:
- Design mechanical or functional parts
- Create objects that need precise dimensions
- Work on architectural or engineering projects
Sculpting tools (like Blender or ZBrush) excel at:
- Creating characters, figurines, or organic shapes
- Designing decorative items without strict measurements
- Adding artistic details to existing models
Free and paid software options for beginners
New 3D modeling enthusiasts have many available options. TinkerCAD provides a browser-based interface that’s perfect for beginners with its simple drag-and-drop approach. SketchUp Free gives you a web-based solution and 10GB of cloud storage to share projects.
Blender stands out as an excellent free option with detailed modeling capabilities for users who need advanced features. SOLIDWORKS for Makers gives hobbyists professional-grade tools at just $48 annually.
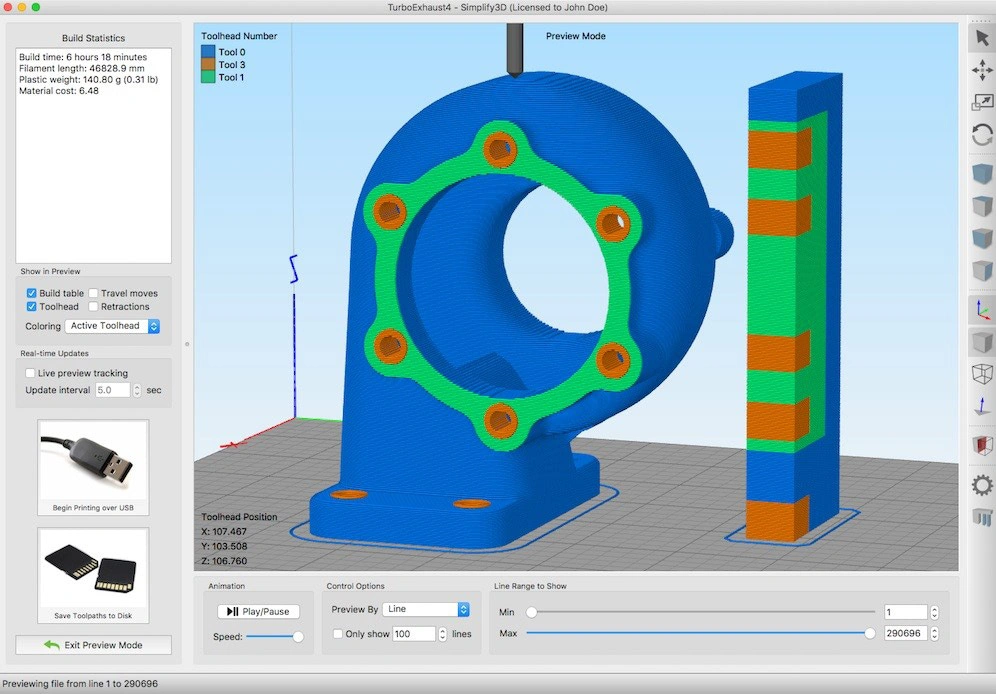
Why slicers matter in the design process
Slicers are a vital part of successful 3D printing. These specialized programs turn your 3D model into printer-readable instructions (G-code). They split the model into printable layers. A 3D printer cannot interpret or create a design without a slicer.
Slicers control everything from layer height to infill percentage and print speed – key factors that affect print quality. They generate support structures for overhangs and optimize print paths to save time and materials.
You can choose between Ultimaker Cura and PrusaSlicer (both free) or Simplify3D (premium). Print quality varies based on your slicer choice, especially with complex designs.
Understand the Core Design Principles
Becoming skilled at fundamental design principles will give you 3D models that print right the first time. These core concepts determine if your creation stands proud or fails during printing.
Wall thickness and minimum feature size
Wall thickness plays a crucial role in structural integrity and print success. Your prints need minimum thicknesses of 0.2mm for SLA, 1mm for FDM, and 0.6mm for SLS technology. Walls without support need to be thicker than supported ones to avoid collapse during printing. Vertical features like pins should be over 3mm in diameter because smaller ones might fail when the material cools faster than it solidifies.
Overhangs, bridges, and support needs
The 45-degree rule makes or breaks successful overhangs—features beyond this angle need support structures. Each new layer at 45 degrees gets support from about 50% of the layer beneath it, which provides enough stability. Horizontal bridges under 5mm usually print without supports, but longer spans will sag unless properly reinforced. Support structures act like temporary scaffolds that prevent collapse during printing and maintain dimensional accuracy.
Designing for strength: layer orientation and infill
Layer orientation makes a huge difference in part strength because of the anisotropic nature of 3D printing. Parts show maximum strength along planes parallel to the build plate, which makes orientation critical for functional parts. Infill patterns and density substantially affect structural integrity. The gyroid pattern delivers excellent strength in all directions, never crosses itself in the same layer, and gives you an excellent strength-to-weight ratio. Triangular infill creates the strongest structure for mechanical applications, while honeycomb gives you the highest strength-to-weight ratio but takes longer to print.
Avoiding warping and distortion
Materials cool unevenly and contract thermally, which causes warping. Layers shrink as they cool and create internal stresses that pull edges upward. Materials like ABS with high thermal shrinkage warp more easily than lower-shrinkage options like PLA. You can prevent warping through several methods: use a heated bed (100-120°C for ABS), add enclosures to keep temperatures steady, and include brims or rafts to improve build plate adhesion. Your part’s geometry matters too—designs with rounded corners warp less than those with sharp angles that concentrate stress.
Optimize Your Model for Print Success
Simple modeling skills are not enough. Knowing how to optimize takes your 3D designs from printable to exceptional. These refinements lead to successful printing and save time and materials.
Hollowing models to save material
Your models become shells instead of solid objects through hollowing. This reduces material usage, print weight, and cost. Wall thickness between 1.8mm and 2.5mm provides the best balance between strength and material savings. Decorative pieces and large models that don’t need internal strength benefit most from this technique.
Adding escape holes for resin prints
Resin printing cannot succeed without escape holes. These strategic openings let trapped resin drain out and balance pressure during printing. You need at least two holes with a 1.5mm diameter placed apart to ensure proper cleaning. Place one hole at the lowest point to drain resin. Add another hole elsewhere to stop vacuum formation.
Choosing the right print orientation
Your print orientation affects strength, surface quality, and support needs. Parts resist compression better along the Z-axis. The X/Y axes provide superior tensile strength. Detailed features show better resolution along the Z-axis because layer height offers finer detail than nozzle diameter.
Checking for manifold geometry and mesh errors
Shapes that cannot exist in reality often lead to print failures. Self-intersections, zero-thickness surfaces, and internal faces are common problems. Tools like Meshmixer’s Inspector can find and fix these issues before printing.
Exporting in the correct file format
STL remains the standard format that offers universal compatibility and reliability. 3MF or VRML/WRL formats work better for multicolor models. STEP or STP files give better results when machining becomes necessary.
Troubleshoot and Improve Your Designs
3D printing challenges affect even seasoned designers. Early problem detection helps you save time, materials, and avoid frustration.
Common beginner mistakes and how to fix them
Most printing failures happen due to preventable design errors. Thin walls are the biggest reason prints fail. Here are other common problems:
- Sharp edges create stress points—use filets instead
- Big volume changes lead to uneven cooling
- Crossed volumes confuse the printer
- Non-manifold geometry (impossible shapes)
Meshmixer’s Analysis Inspector tool shows holes and non-manifold areas with colored markers. It provides automatic fixes for these problems.
How to test and iterate your model
The design-print-test cycle gives 3D printing its biggest advantage. You can create your original design, print it quickly, assess performance, and make changes. A 24-hour cycle works best – design during the day, print at night, and test in the morning.
Your first prints should focus on proving geometry and fit right before you invest in functional materials.
Using print previews and layer views effectively
Looking at layer views helps you catch potential failures before printing starts. Modern slicers show exactly how each layer will print. You can spot:
- Unsupported overhangs
- Areas with insufficient infill
- Sections that need extra strength
A few minutes spent checking these views prevents hours of failed printing.
Conclusion
Becoming skilled at 3D print design needs both technical knowledge and creative thinking. In this piece, you’ll learn everything that turns digital models into successful physical objects. Wall thickness, proper orientation, and material choices are the foundations for creating prints that look impressive and work properly.
Software options play a vital role when you start your experience with 3D modeling. Project requirements determine the choice between CAD and sculpting tools, while slicers connect design to physical production. Blender and TinkerCAD offer powerful features at no cost.
Design optimization methods boost print quality and cut down material waste. Models become more efficient and structurally sound through hollowing, strategic placement of escape holes for resin prints, and proper infill patterns. Designers who use these methods get better results and face fewer failed prints.
Troubleshooting is a key part of the 3D printing workflow. New users often struggle with wall thickness, overhangs, and non-manifold geometry. Modern software comes with powerful analysis tools that spot potential issues before printing starts. This preview feature saves hours and materials that would be wasted on failed attempts.
The ability to iterate quickly stands out as 3D printing’s biggest advantage. Users can test prototypes, spot improvements, and make changes fast. This quick feedback helps beginners learn and gain experience rapidly.
Note that patience and practice lead to expertise when you start your 3D printing experience. Every print teaches valuable lessons, whether it succeeds or fails. The knowledge from this piece helps beginners create beautiful models on their first try and explore what a world of additive manufacturing can offer.
Key Takeaways
Master these essential principles to transform your 3D modeling skills from beginner to confident designer, ensuring your prints succeed on the first attempt.
• Choose CAD software for precise functional parts and sculpting tools for organic shapes—TinkerCAD and Blender offer excellent free starting points for beginners.
• Follow the 45-degree rule for overhangs and maintain a minimum wall thickness of 0.2mm (SLA), 1mm (FDM), or 0.6mm (SLS) to prevent print failures.
• Hollow models to save material, add escape holes for resin prints, and check for non-manifold geometry using analysis tools before printing.
• Use the design-print-test cycle to rapidly iterate and improve—print overnight, test the next morning, then refine your design based on results.
• Preview layer views in your slicer to spot potential failures like unsupported overhangs or insufficient infill before wasting time and materials.
The key to 3D printing success lies in understanding that every design decision—from software choice to wall thickness—directly impacts your final print quality. By applying these fundamental principles and embracing the iterative nature of 3D printing, beginners can quickly develop the skills needed to create functional, beautiful objects that print reliably every time.
FAQs
Q1. What are the main types of 3D modeling software for beginners?
There are two main categories: CAD (Computer-Aided Design) software for precise, technical designs, and organic modeling software for more free-form, artistic creations. Popular CAD options include Fusion 360 and TinkerCAD, while Blender is a versatile choice for organic modeling.
Q2. How long does it typically take to learn 3D modeling for 3D printing?
The learning curve varies, but with consistent practice, beginners can start creating basic models within a few weeks. More complex designs may take several months to master. For example, the author of the guide was able to create marketable models after about two months of weekend practice.
Q3. What are some common mistakes to avoid when designing 3D models for printing?
Common beginner mistakes include insufficient wall thickness, creating non-manifold geometry, and not accounting for overhangs or support structures. It’s important to understand the limitations of your 3D printer and design accordingly to ensure successful prints.
Q4. How can I optimize my 3D models for better print quality?
To optimize your models, consider factors like proper wall thickness, orientation for strength, and appropriate infill patterns. Use tools like layer preview in your slicer software to check for potential issues before printing. Hollowing models and adding escape holes for resin prints can also improve results.
Q5. Is it necessary to pay for 3D modeling software as a beginner?
No, it’s not necessary to pay for software when starting out. There are many free options available, such as TinkerCAD for beginners and Blender for more advanced users. As you progress, you may find paid software offers additional features that suit your needs, but it’s possible to create impressive models using free tools.